
Return to Power Automate and create our new Update Service Instant flow. We will use the following components:
- Trigger – Power Apps – When a Power Apps calls a flow (V2).
- Scope – Try
- Action – Dataverse – Update a row
- Action – Response – rename as “Successful Response”
- Scope – Catch (run after Try failed)
- Action – Response – rename as “Failed Response”
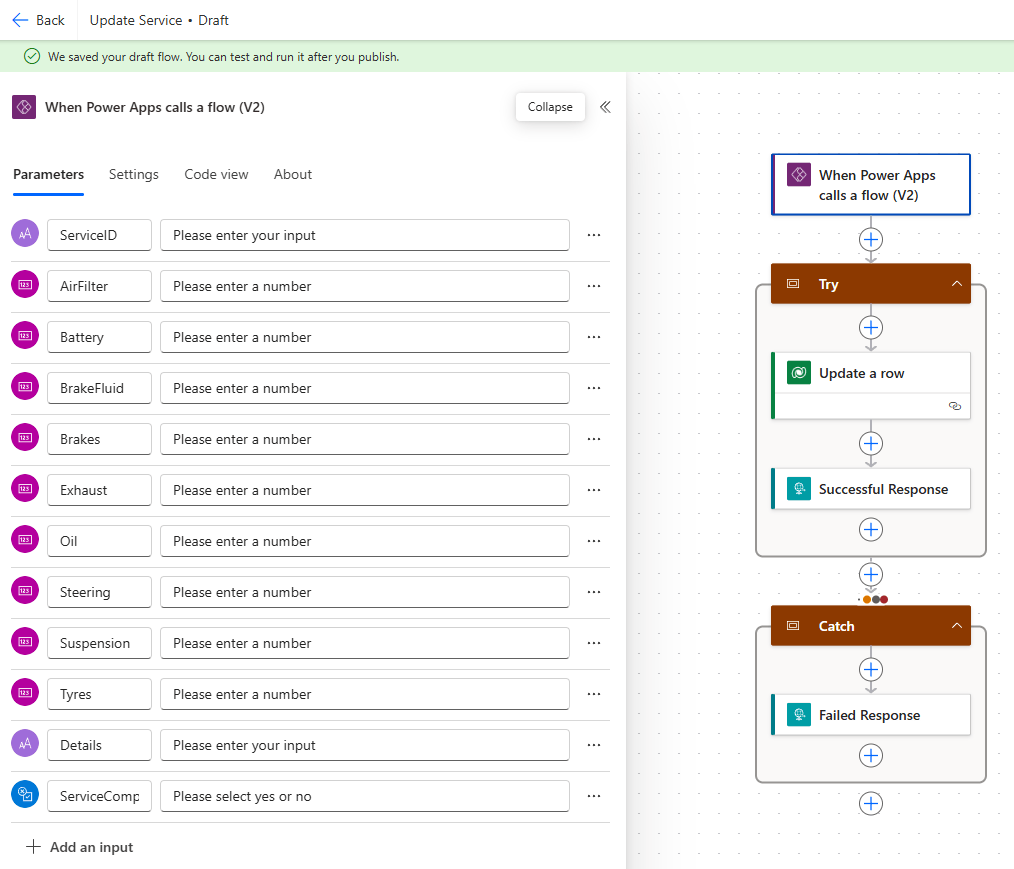
For our Trigger, we should add the following parameters
- Text – ServiceID, Details
- Number – AirFilter, Battery, BrakeFluid, Brakes, Exhaust, Oil, Steering, Suspension, Tyres
- Yes/No – ServiceComplete
Pay attention to the order of our parameters.
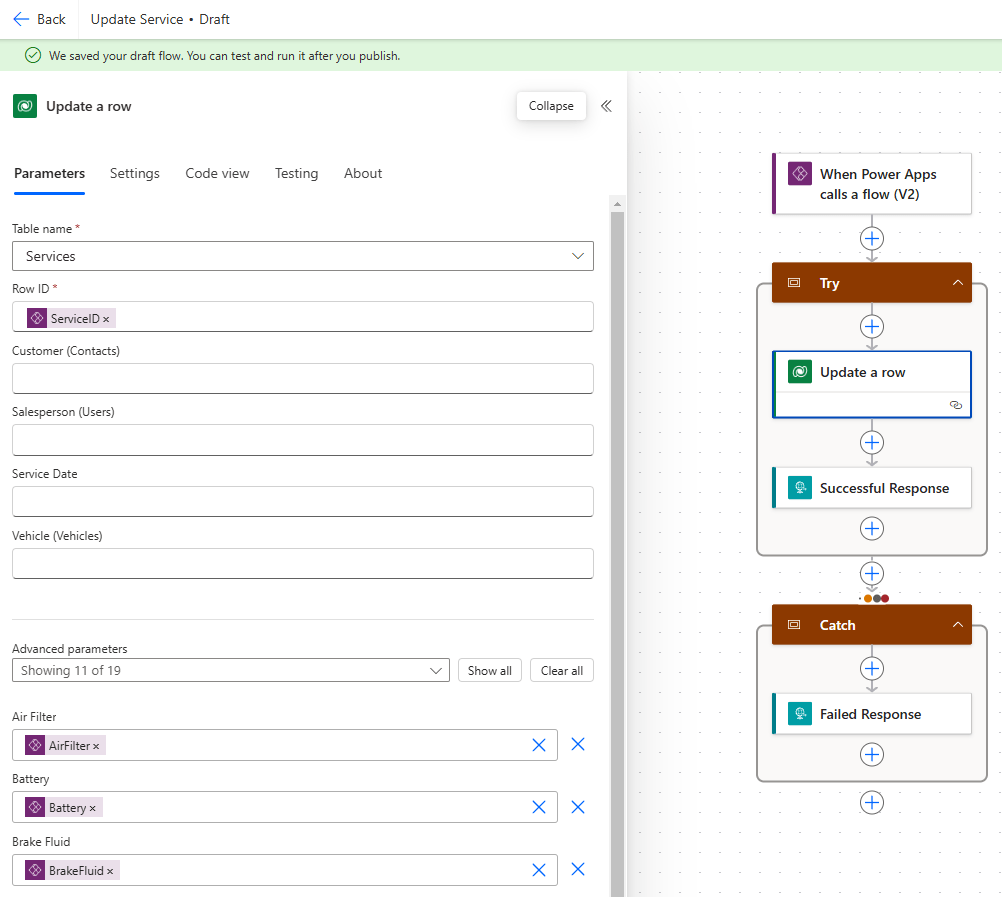
Next, expand the Update a row action and complete as follows
- Table name – Services
- Row ID – ServiceID (input parameter)
- Air Filter – AirFilter (input parameter)
- Battery – Battery (input parameter)
- …etc repeat for all parameters passed in including Details and Service Complete
Update the Successful Response action to set Status Code to 200; update the Failed Response action to set Status Code to 500. Save and publish our flow and add to the solution as before.
Return to our canvas app and add the Update Service flow.

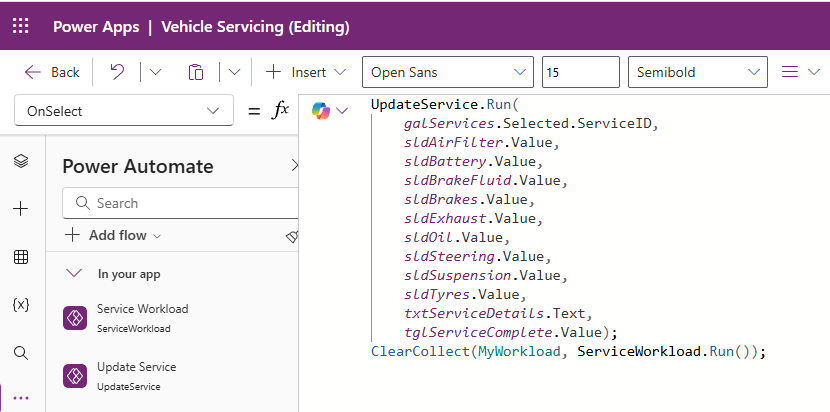
Lastly, we update the OnSelect property of our Save button to run our Update Service flow, passing in the values of our controls:
UpdateService.Run(
    galServices.Selected.ServiceID,
    sldAirFilter.Value,
    sldBattery.Value,
    sldBrakeFluid.Value,
    sldBrakes.Value,
    sldExhaust.Value,
    sldOil.Value,
    sldSteering.Value,
    sldSuspension.Value,
    sldTyres.Value,
    txtServiceDetails.Text,
    tglServiceComplete.Value);
ClearCollect(MyWorkload, ServiceWorkload.Run());
Then we refresh the Gallery items by calling ClearCollect(MyWorkload, ServiceWorkload.Run()).
Now we can remove the Services dataset from our canvas app and not worry about how our application will perform as the Services table grows over time!
Recap on what we’ve learned:
- The User(), Today() and Filter() functions.
- Using Dataverse Views to filter datasets.
- Adding Power Automate flows to a canvas app to fetch data.
- Using FetchXML to perform cross table queries.
- Adding Power Automate flows to a canvas app to update records.

Leave a comment