
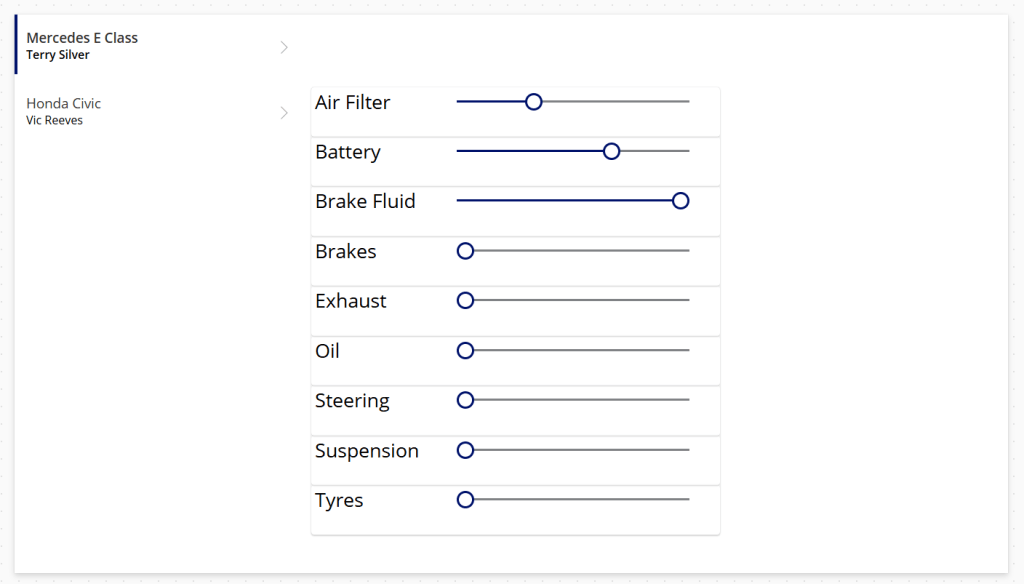
Now we have to modify each of our Horizontal containers to represent each of our testable items. This is a bit tedious. Here’s a quick recap on what to do for each item:
- Rename controls
- Horizontal containers – e.g. hconAirFilter, hconBrakes, hconOil
- Text labels – e.g. lblAirFilter, lblBrakes, lblOil
- Sliders – e.g. sldAirFilter, sldBrakes, sldOil
- Update Default Slider value
- sldAirFilter – galServices.Selected.’Air Filter’
- sldBrakes – galServices.Selected.Brakes
- sldOil – galServices.Selected.Oil
- …etc.
- Update label text for each test item.
This should result in the following:
Now we want to add controls to capture the Details and Service Complete properties. Drag another Text label onto the canvas and set the text to “Service Details”. Then drag a Text input control onto the canvas, resulting in the following:
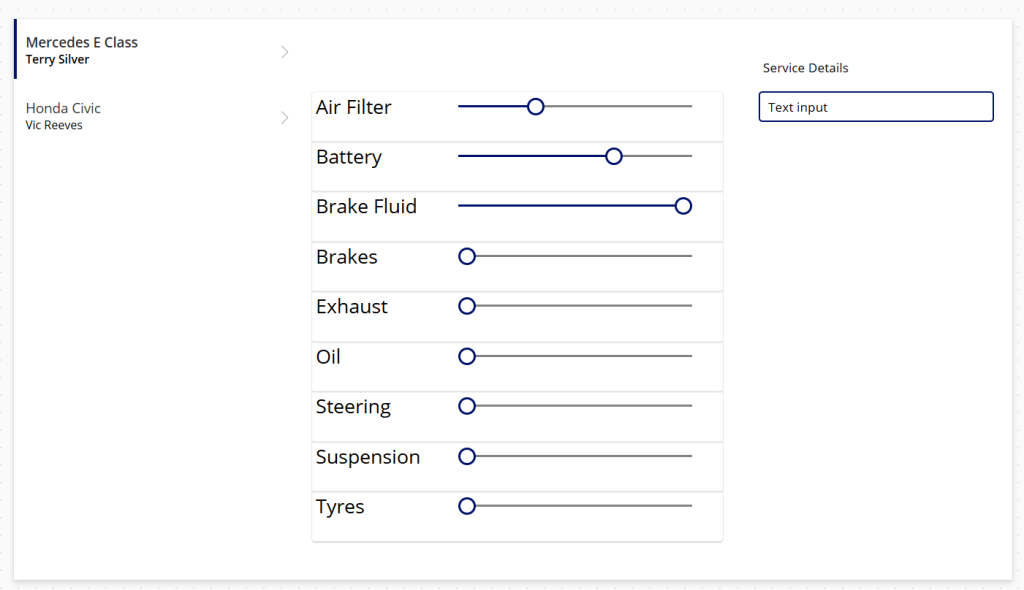
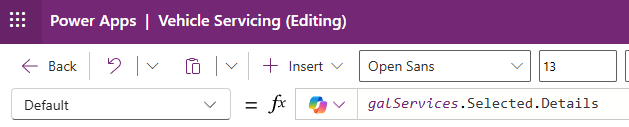
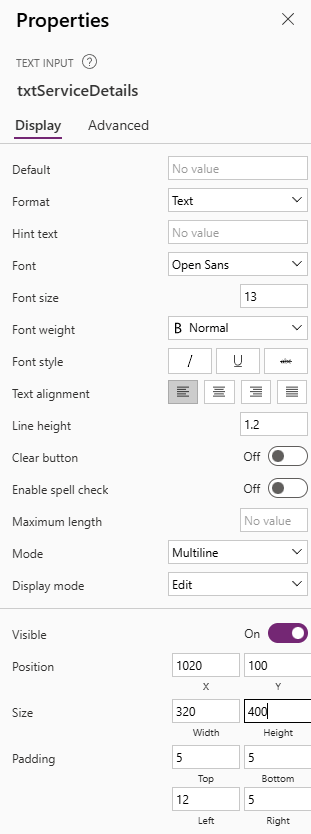
Rename the Text input control as txtServiceDetails and set its Default value to be galServices.Selected.Details – the Details property of the currently selected Gallery item.
We can also update the properties of the textbox in the right hand properties bar:
- Mode – Multiline
- Size
- Width – 320
- Height – 400
Now lets add in the Service Complete property – from the left hand navigation, drag in another Text label and a Toggle control:
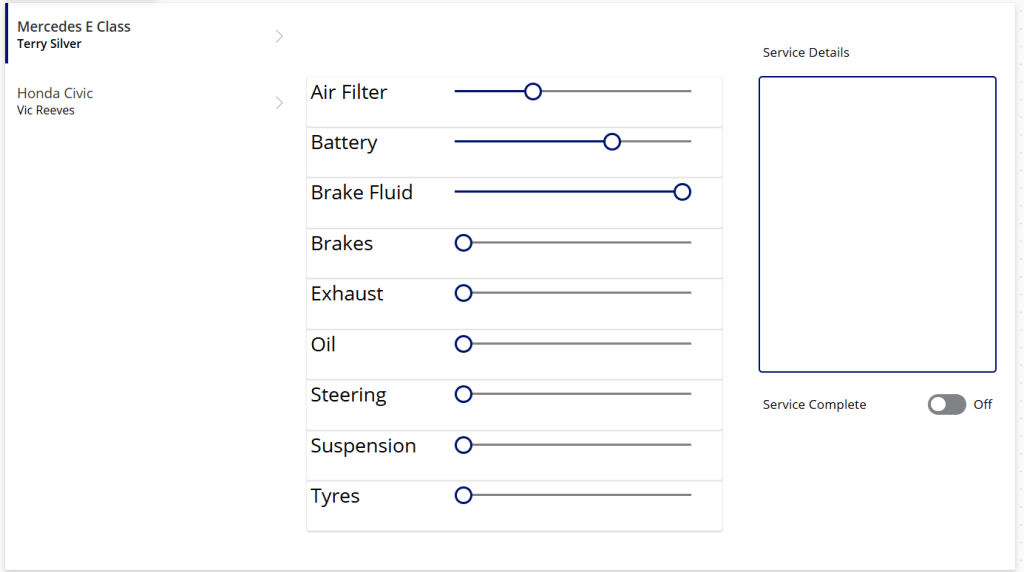
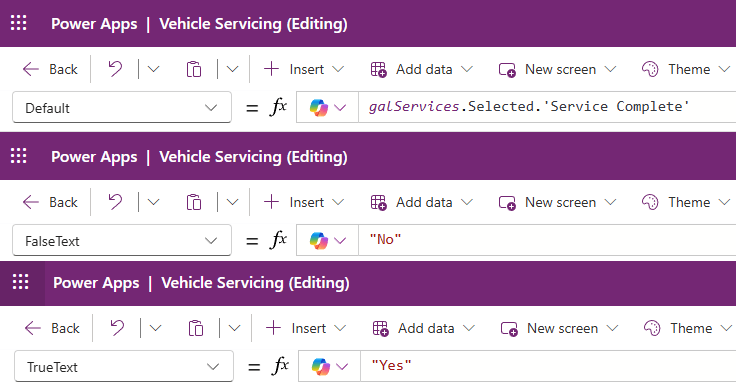
Rename the Toggle control as tglServiceComplete as set the following properties:
- Default – galServices.Selected.’Service Complete’
- This is the Service Complete value of the currently selected Gallery item.
- FalseText – “No”
- This is the value we wish to show when the control toggle is Off / False.
- TrueText – “Yes”
- This is the value we wish to show when the control toggle is On / True.

Leave a comment