
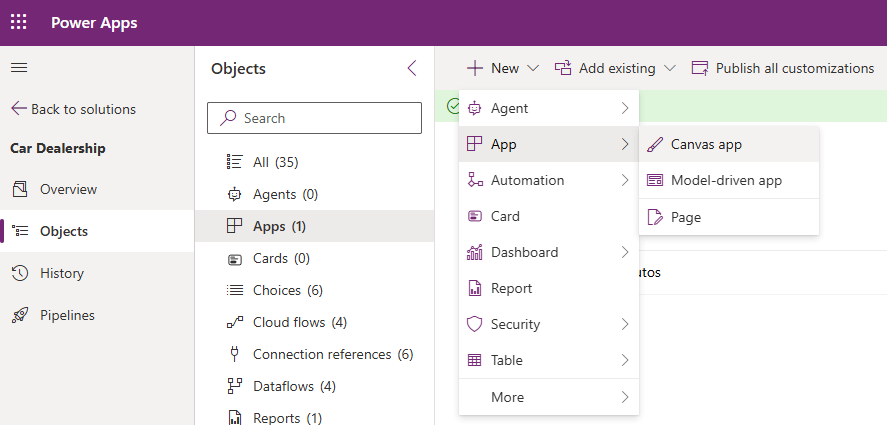
Data model complete, so now we move onto the app! From our solution view, click + New > App > Canvas app from the top ribbon.
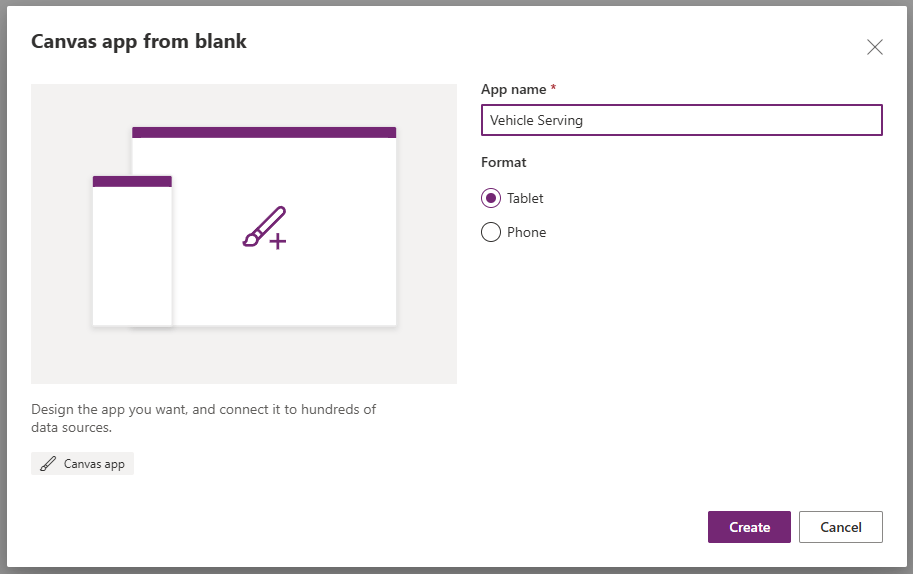
Set the App name to Vehicle Servicing, and format as Tablet then click Create.
This will open the canvas app studio:
- The leftmost quarter of the screen by default shows a tree view of the app and its interface components.
- The rightmost quarter of the screen shows the properties of the selected interface element.
- The centre half of the screen is the canvas we will edit.
- The top ribbon given us access to various contextual controls.
It’s a good habit to give names to our frequently used controls. From the tree view select the three dots beside Screen1 and choose Rename. Give it the value scrInspections.

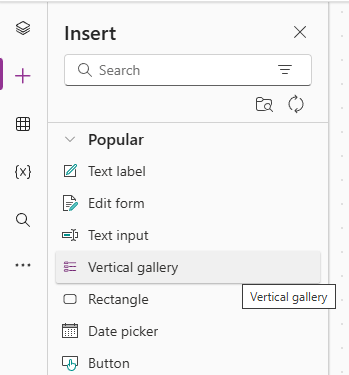
From the leftmost menu, click the + link. This will allow us to add elements to the canvas. Click on Vertical Gallery.
This will update the canvas with a scrollable list, filled with dummy data. Rename the Gallery control as galServices.
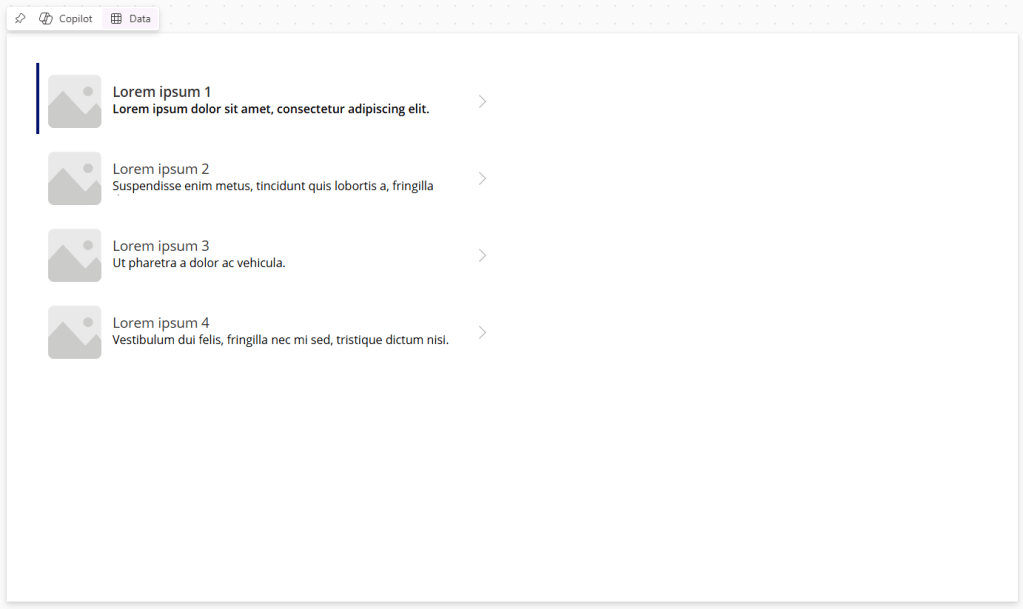
We want to populate this list with data from our Services table. Click on the Data link and select Services as our data source.

Initially, we will see some errors – click on the Fields button to see the properties being displayed. Each row in our list represents a record in the Services table, and the object ThisItem is how we reference the record. We have errors here because the Service table does not have columns called SampleText and SampleHeading, so we should change those.
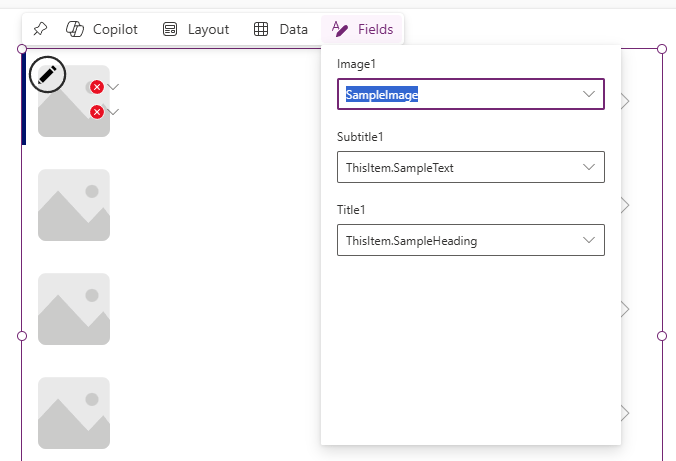
For now, let’s replace both with ThisItem.Service – we can update this from the context menu.
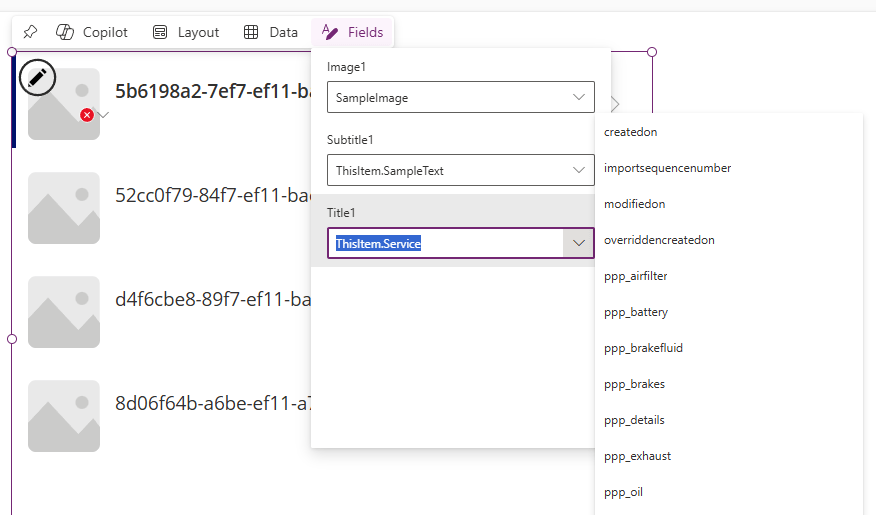
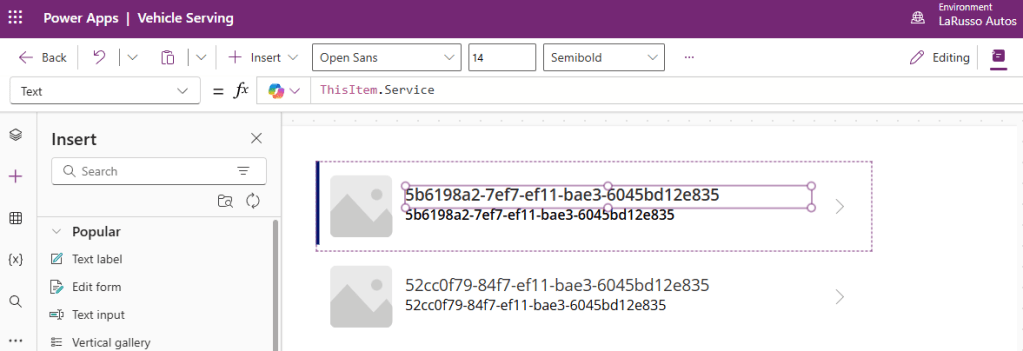
Select the top textbox. Note the value of Text in the formula bar as ThisItem.Service.
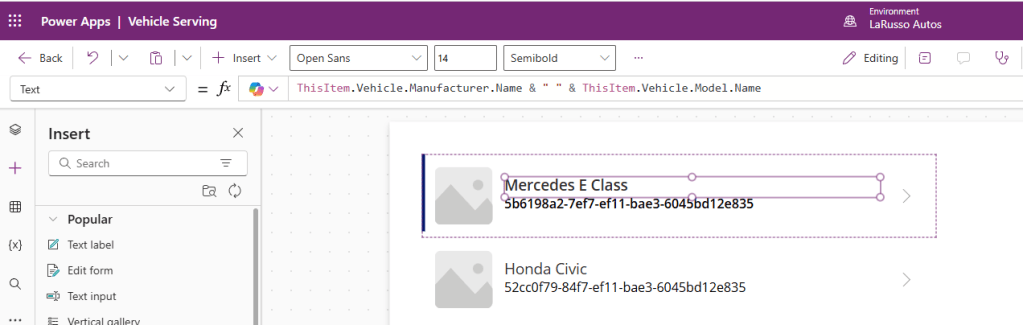
Let’s change this. If we type ThisItem. we can see the full list of properties that we can use, including lookup properties such as Vehicle.

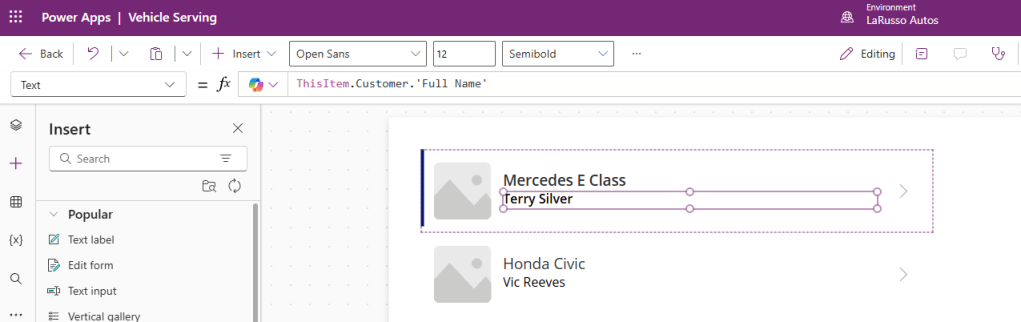
We want to display the Vehicle Manufacturer and Model, so we update the formula bar to be ThisItem.Vehicle.Manufacturer.Name & ” ” & ThisItem.Vehicle.Model.Name. Note how we are concatenating two values here into a single string. Observe the updated items.
Next, we select the second textbox, and update the formula bar to ThisItem.Customer.’Full Name’. (Note the use of quote because the property has a space; canvas apps use the Display name of Dataverse columns rather than the Logical name). Observe the changes below.
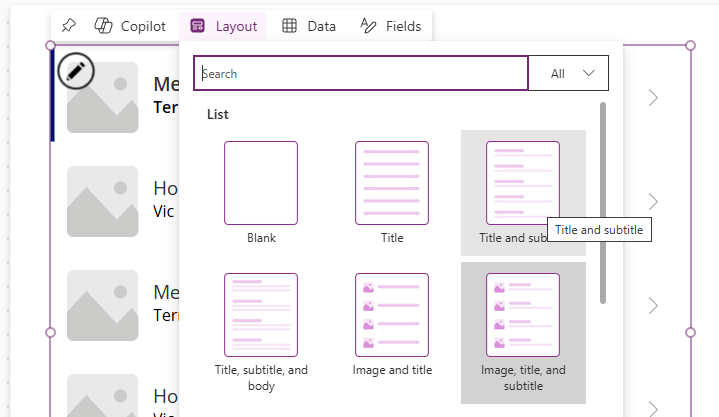
Lastly, we want to get rid of that useless image on the left. Click on the Gallery control and select the Layout button. Choose Title and subtitle from the options.
Our updated Gallery should now look like this:


Leave a comment