
In our previous post we looked at Automated Flows, which are triggered in response to some other event. By contrast, Instant Flows are those triggered on demand. Examples of such flows include those triggered by:
- Pressing a Power Automate Flow button for mobile
- Making a flow request from a Canvas App
- Calling an Action from a Copilot chatbot
We will look into Canvas Apps and Copilot chatbots in future posts, but the question now is how can we use Instant Flows in our model-driven apps? In this post, we’ll show how they can be used to reduce duplication across the flows we write, making them modular and more easy to maintain.
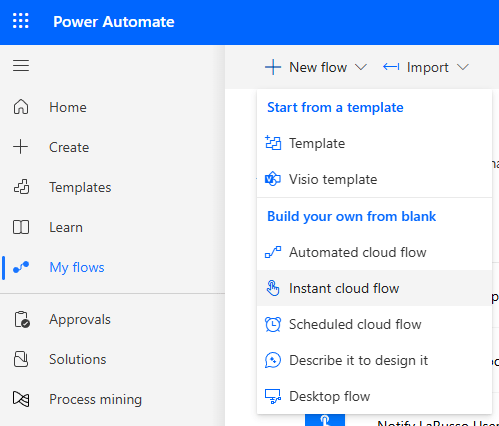
For now, let’s introduce a simple Instant Flow to send myself a push notification. From Power Automate, choose My flows from the side navigation, then + New flow > Instant cloud flow from the ribbon on top.
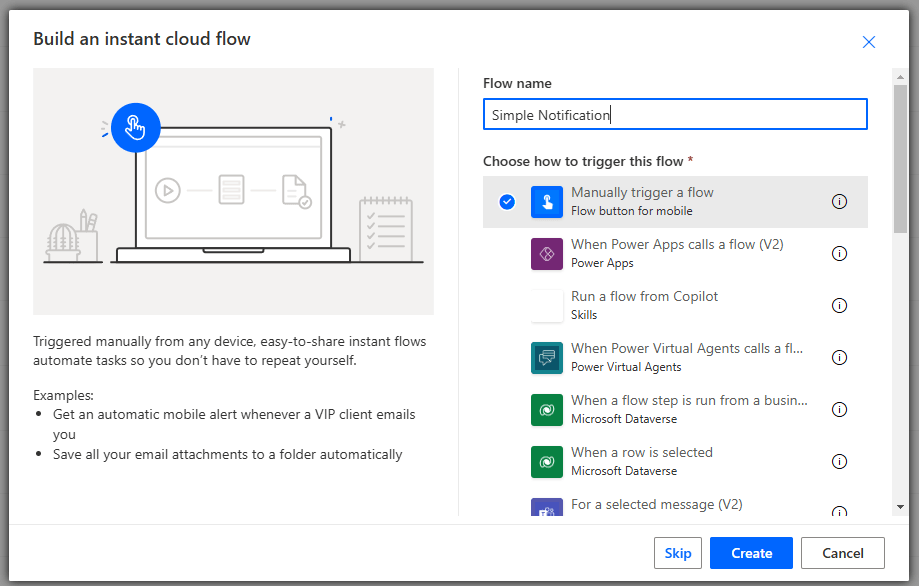
Complete the dialog that appears as follows:
- Flow name – Simple Notification
- Select Manually trigger a flow – Flow button for mobile
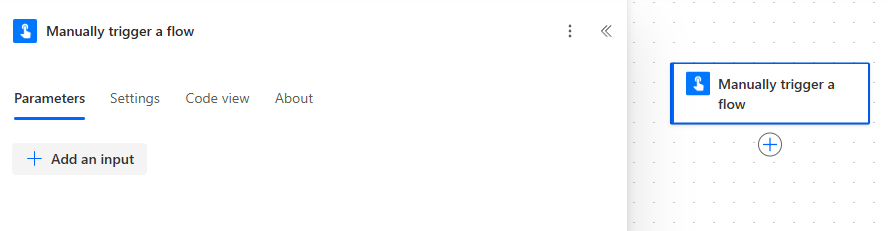
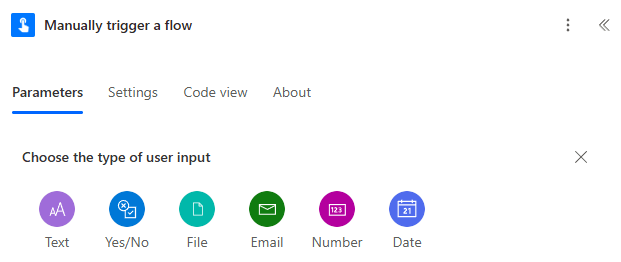
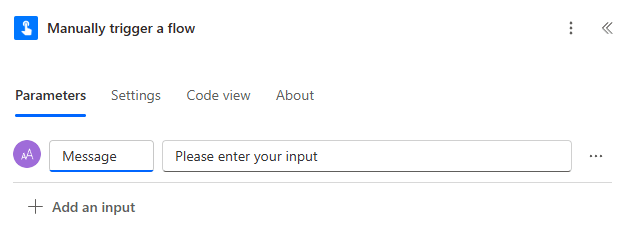
Click on the Manually trigger a flow Trigger to see the parameters. Click on the + Add an input button – we want to take an input that will appear as the message in our push notification.
From the options that appear, select Text:
Name our parameter Message.
Next, we add a Notifications connection, specifically the Send me a mobile notification Action.
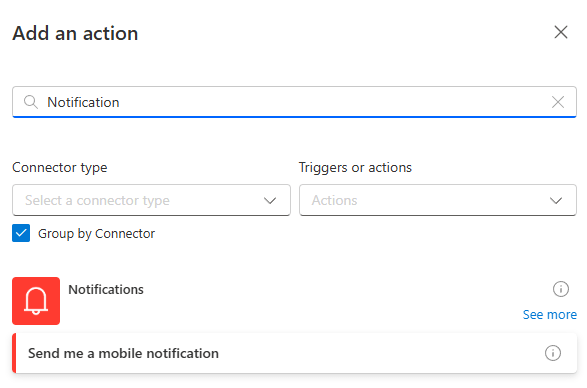
Complete the Action by setting the Text parameter to be the Message value from the Manually trigger a flow Trigger:

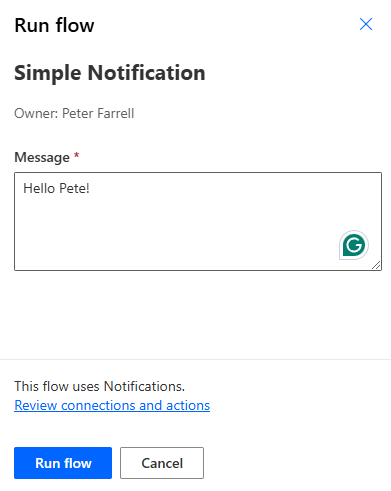
Click the Save button, then Publish. Next, click on the Test button, and I can test sending a simple push notification to myself.
Pretty straightforward stuff, but how can we make Instant Flows more useful to us in our model-driven apps?
In our previous post, we created two flows:
- Create Service Appointment – runs when a new record is added to the Service table.
- Updated Service Appointment – runs when the Mechanic column of any record in the Service table is updated.
Aside from the Triggers, these two flows do the same sequence of Actions:
- Check if Mechanic is not null.
- Get Customer Details.
- Get Mechanic Details.
- Add a calendar appointment to the Mechanics calendar.
This is somewhat tedious to maintain – is we want to make a minor change here, we must do it in both flows. Maybe we want to get the details of the Vehicle being serviced and add those to the appointment body – we’d have to do that twice.
In a traditional programming language, we’d take this main sequence of actions and put it inside a common function. We would have separate functions for Create Service Appointment and Updated Service Appointment, but they would call the same underlying common function to carry out same actions. It’s called the DRY Principle – Don’t Repeat Yourself!
And that’s what we’ll implement today with Power Automate!

Leave a reply to Mail Merge – Document Generation with Power Automate – Power Platform Pete Cancel reply