Many people don’t realise that the required user licenses for model-driven apps include Power Automate functionality in the cost, with the ability to run flows with premium functionality. This means that we can enhance our apps with automated workflows at no additional cost to our end users. What does this mean for the apps we have created?
So far, we have created two apps – the LaRusso Autos app and the Miyagi-Do Dojo Membership app. Both apps allow us to create and update records using Forms; filter, sort and look up data using Views; and the LaRusso Autos app visualises data using Charts.
This is great, but it’s also a very static experience – we capture, observe and update data and that’s that. Power Automate allows us to create automated workflows to react to the data we have entered, improving the user experience. Consider the following automated processes:
- Scheduled reminders for submitting timesheets or expenses
- Generating a monthly sales report
- Creating calendar appointments for Sales staff for customer meetings
- Notifying customers of upcoming sales events via email and / or social media
We can create all these using Power Automate! But how? Let’s begin with the first example to introduce some of the basic concepts of Power Automate, and revisit the other examples in subsequent posts as our understanding grows.
We begin by signing into https://make.powerautomate.com/ and navigating to the environment out LaRusso Autos solution is in. From the side navigation, click My flows, and from the top ribbon select + New flow > Scheduled cloud flow.

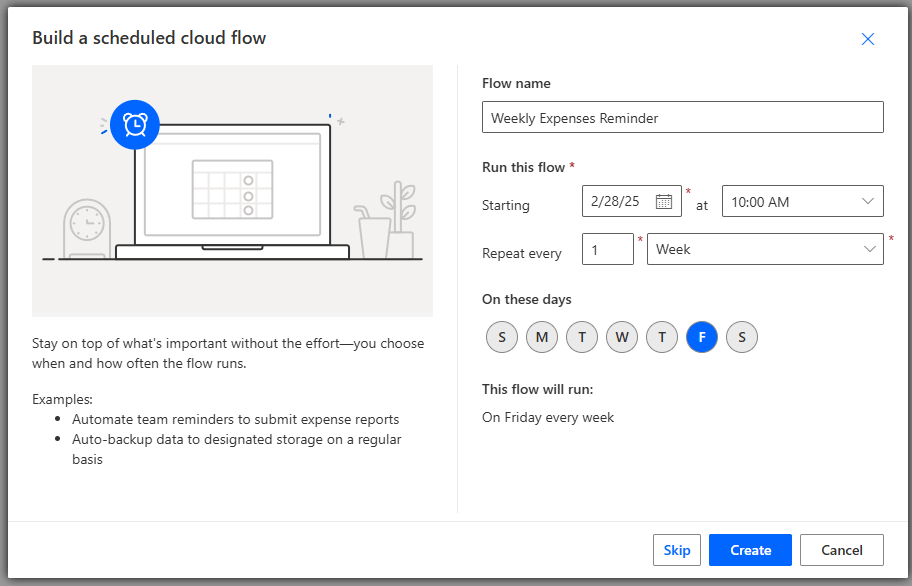
The dialog that appears asks us to give a name for our flow, and to set a schedule. Complete as follows:
- Flow name – Weekly Expenses Reminder
- Run this flow
- Starting – start date and time of your choice
- Repeat every – 1 week
- On these days – select Friday
This results in a flow that will run at 10AM every Friday morning.
Incidentally, this step of our Power Automate flow is called the Trigger. The trigger defines the start condition for any flow, and there are three types:
- Scheduled – flow will run in accordance with a user defined schedule.
- Automated – flow will run when a user defined event occurs, such as receipt of an email or creation of a new record in Dataverse.
- Instant – flow will run when a user clicks a button, such as a button in a Power App.
Clicking the Create button will take us to the Power Automate flow canvas. If we click on our Recurrence trigger, we can see the detailed parameters on the left of the screen.
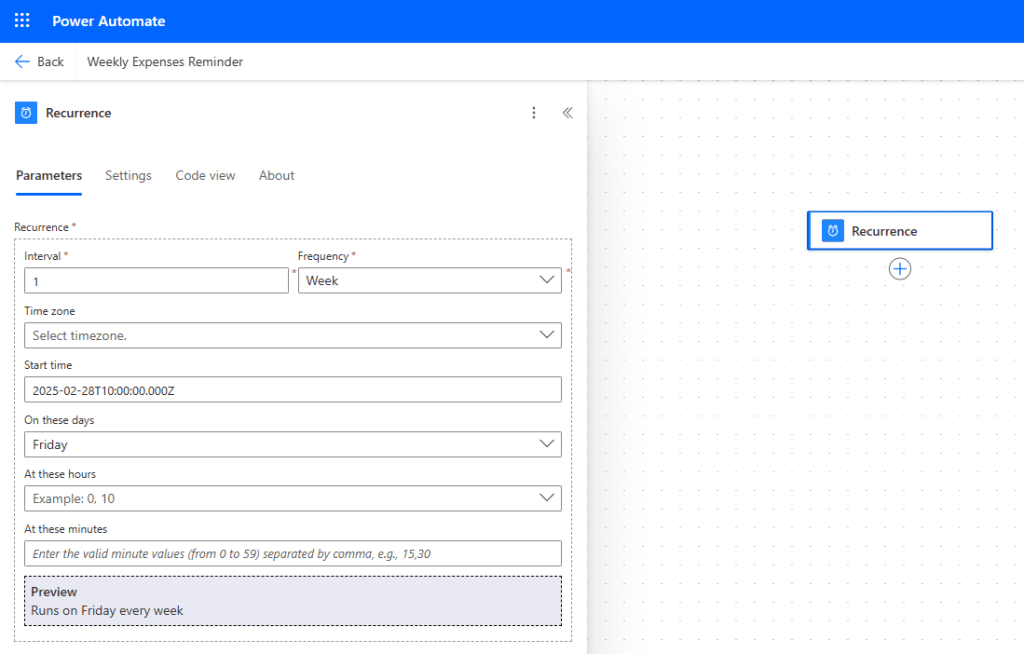
As stated before, our Trigger defines when our flow will execute, and each flow will have only one Trigger. WHat a flow does while it is running depend on what Actions we add. Lets begin by clicking the + symbol below our Recurrence trigger.
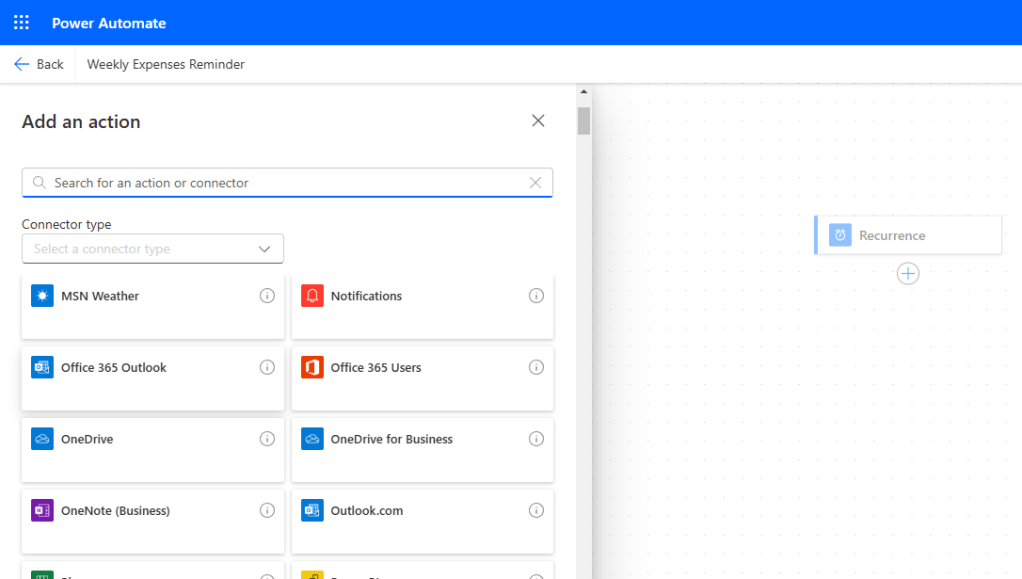
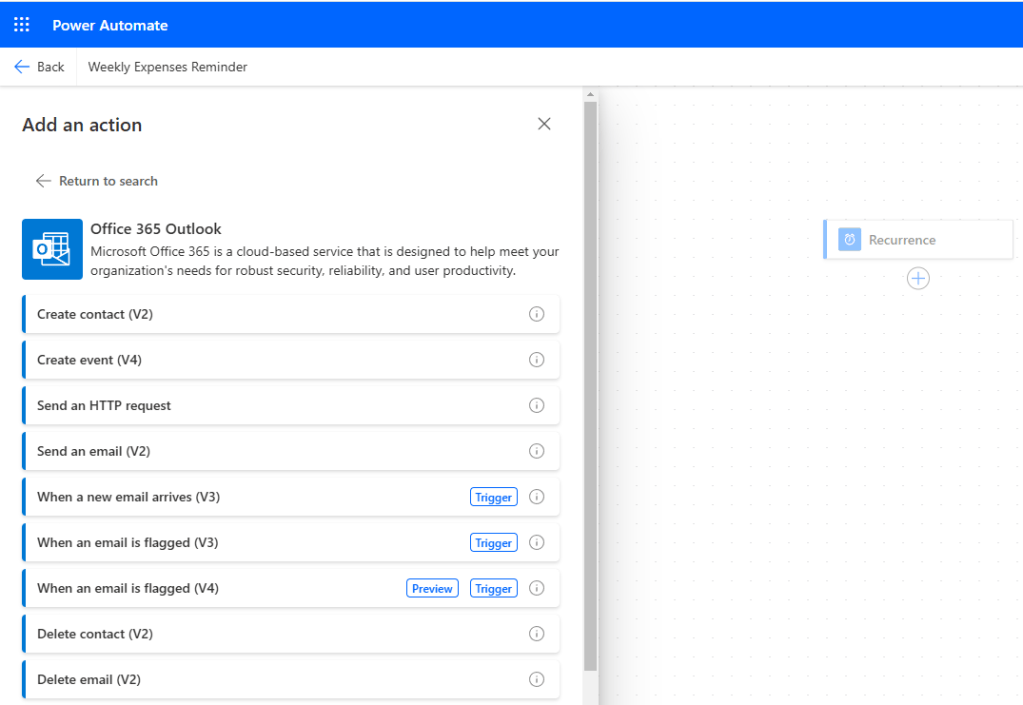
The left hand dialog will fill with hundreds of options here. Each option is a Connector – this represents a product or service that can be integrated into Power Automate flows using out of the box features i.e. no coding expertise required. This includes products and services outside of the Microsoft ecosystem and there are over 1000 connectors available. If you haven’t done so already, I’d encourage you to have a look at what’s available and let your imagination run wild!
For this post, as an introduction to Power Automate, we’ll keep things simple. Select the Office 365 Outlook Connector. You’ll see that this single Connector has many different Actions available to use in our flows. There are also several Triggers defined, but we’ll look at those in a later post about Automated Triggers. In this post, we want to send a weekly email, so click on the Send an email (V2) option.
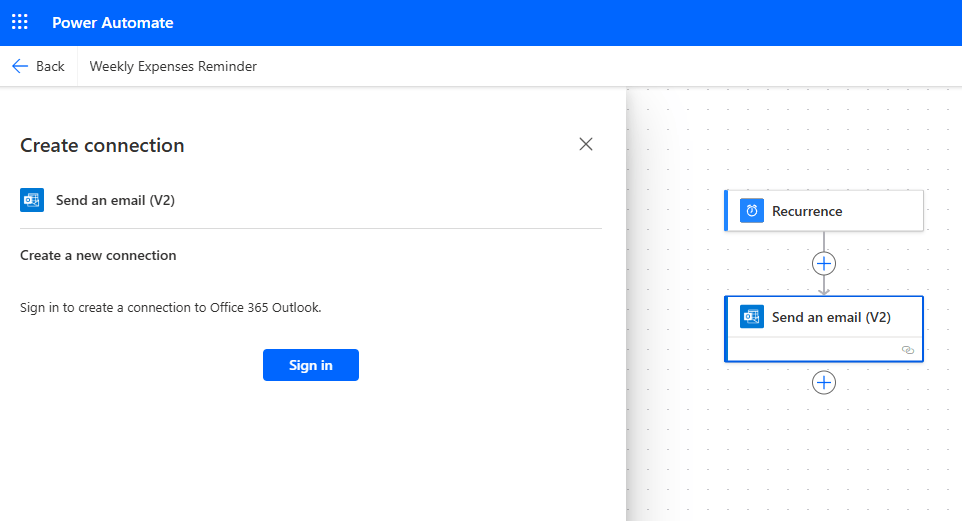
The next step is to provide user credentials for the Connector we wish to use. Connectors represent the list of products and services that integrate with Power Automate, whereas Connections represent an instance of a Connector, which may require authentication as the Office 365 Outlook Connector does. When I sign in with my credentials, the flow will send emails as if they were sent by me.
Once signed in, I can click on the Send an email (V2) Action to set the parameters, which I complete as follows:
- To – distribution list email address for LaRusso Autos
- Subject – Weekly Expenses Reminder
- Body – This is your weekly reminder to submit expenses
- Importance – Normal
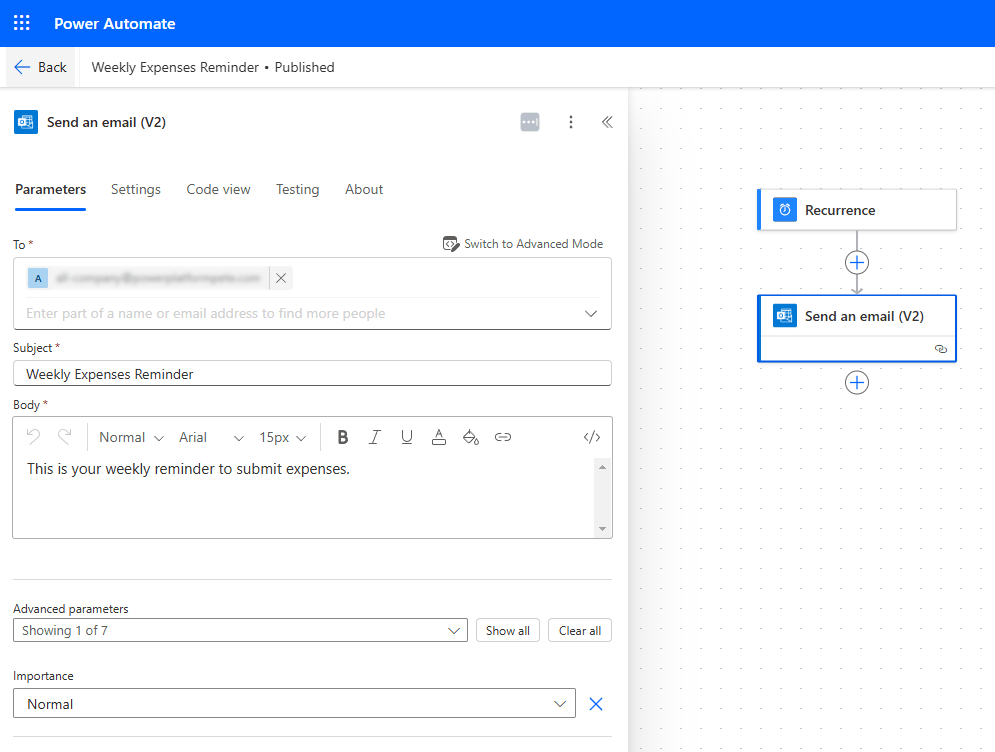
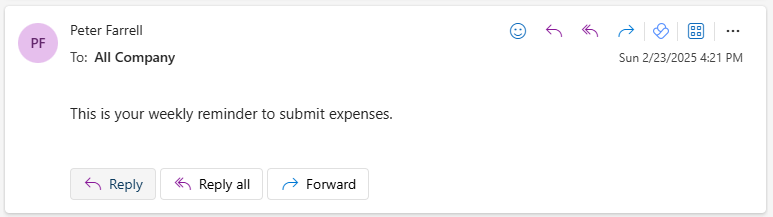
Click the Save button, then Publish in the top ribbon. You can also click the Test button and see the sample input in your inbox – not that the From address matches that of the credentials used to sign in when creating the Office 365 Outlook Connection.
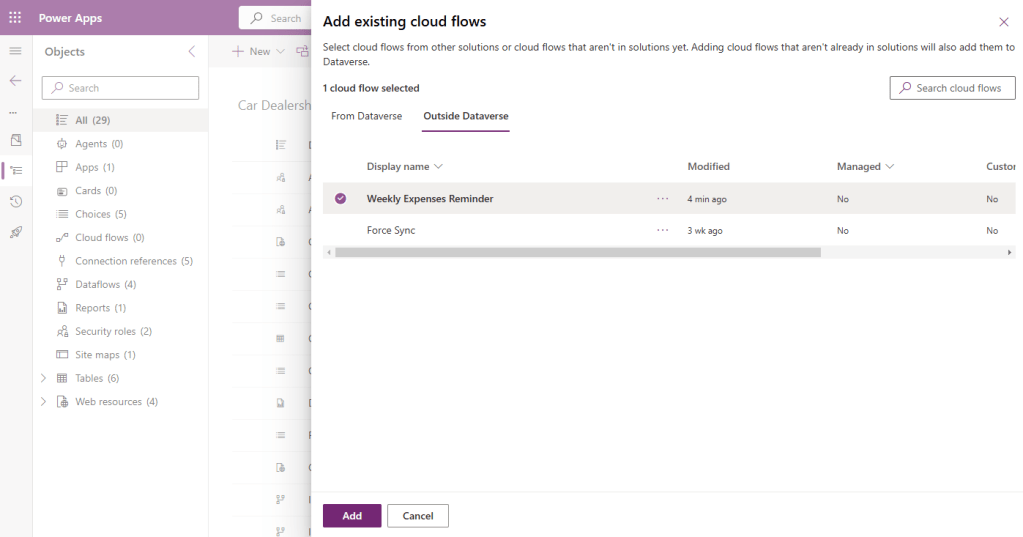
So that’s our flow. the next thing we want to do is add it to our LaRusso Autos solution. To do this, we must go back to https://make.powerapps.com/ and select our solution. From the solution view, select Add Existing > Cloud flow.

From the dialog that appears, select Outside Dataverse, and select our Weekly Expenses Reminder flow before clicking Add.
Almost there! The final stage of solutionising our flow is to add in all the Connections we created as part of it. From the solution view, select Cloud flows from the side navigation. Select our Weekly Expenses Reminder flow and click the three dots there. From the dialog that appears, select Advanced > + Add required objects.

And we’re done! What have we learned?
- Triggers vs. Actions
- Types of Trigger
- Connectors vs. Connections
- Adding flows to solutions
This is a very simple flow consisting of a Scheduled Trigger and a single Action, but in future posts we’ll look into more complex flows with different Triggers, multiple Actions, branching, looping, error handling and lots more!

Leave a reply to Enhancing Power Apps with Power Automate – Part 2: Automated Flows – Power Platform Pete Cancel reply