
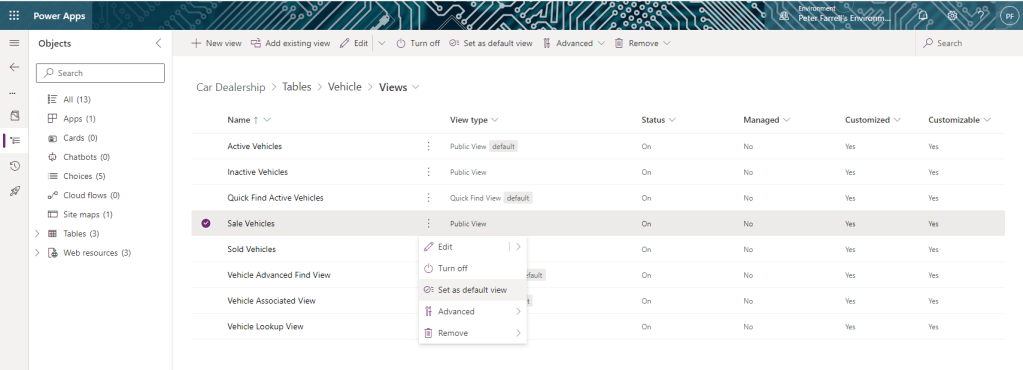
Setting Default Views
Return to our solution view. Choose Tables > Vehicle > Views from the side navigation. We want to make Sale Vehicles our default view – when a user logs in, by default they will see the list of vehicles for sale. To do this, select the three dots beside Sale Vehicles. From the dialog shown choose Set as default view.
Next select Apps from the side navigation and launch our app. From the side navigation on the app, select Vehicles to display our new default view Sale Vehicles.
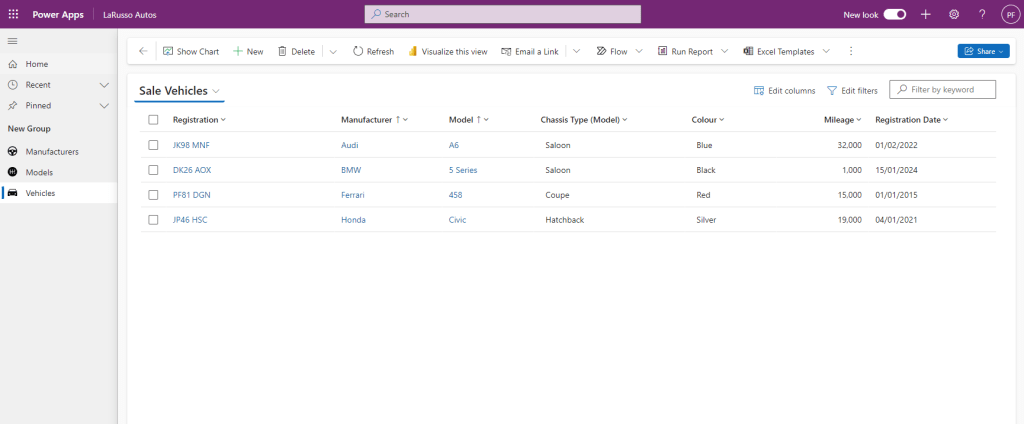
If we click on Sale Vehicles at the top, we can change views.

Let’s select Sold Vehicles to view that list.
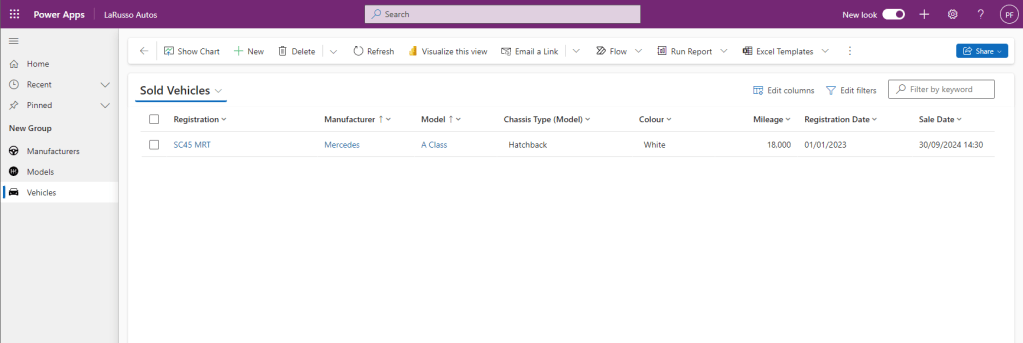
Note this view has the additional Sale Date column. We can have as many views as we like on a view, and users can create and share their own – perhaps one user is only interested in selling a particular brand, or vehicles over a certain value.

Leave a comment