
In this lesson, we will cover:
- Forms – the interface for creating and editing records.
- Views – the interface for displaying tables of records.
- Miscellaneous
- Out of the box validation
- Relationships, lookups and modal popups
- Choice fields vs. Lookup fields
- Sorting and filtering views
- Related records in Lookup fields
- Multi-column displays
- Related fields
Now that we’ve built our data model, let’s look at how users will view and interact the data stored in our application.
The Manufacturer Table
From our solution view, expand Tables -> Manufacturer and click on Forms to show the following:
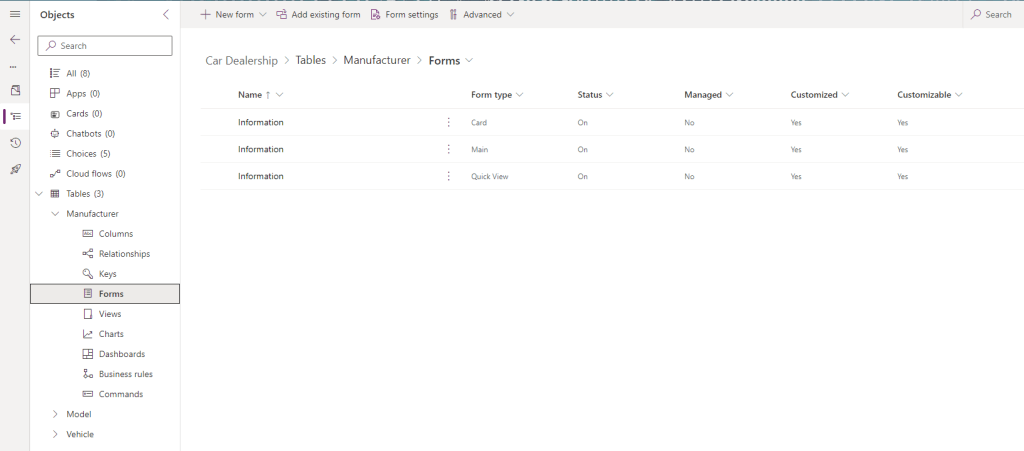
We’re interested in the second form here, the one where Form type is Main. The different types of forms and their uses are a topic for another day; let’s click on our Main form for now. The following is shown:
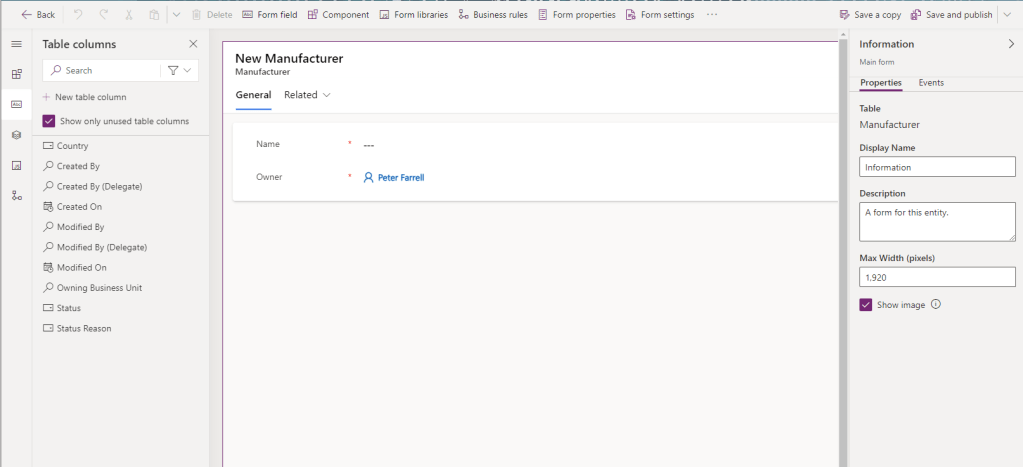
Forms are the screens used to enter new records to a table, or edit existing records. For any new form, the following fields are shown by default:
- Primary column – in this case, Name.
- Owner – the app user to whom the record is currently assigned to; by default, this is the user who created the record.
Note that the Name field is marked with a red star. This is because we defined this field as Business Required in our data model in the previous post, and the form will enforce this validation. As a .NET web developer, I had to add this validation in by myself; with Dataverse based apps, this functionality is out-of-the-box.
From the left hand side of the screen, we can see the list of available fields that we can add to our form. Let’s click on Country and drag and drop it onto our form between the Name and Owner fields:

Note that Country does not have a red star because we defined it as Optional. We’re not really interested in the Owner field in this exercise, so we’ll remove it from the form. Click it to highlight:

If a field is marked as Optional, there will be an button in the header to Delete the field from the form. However, as Owner is a Business Required field, we cannot Delete it from the form, but there is a button to Hide it. Click that button in the header. If you need to see which controls have been hidden in the form, there is a toggle at the bottom of the screen:

And that’s our first Form! Click the Save and publish button in the header, then the Back button to return to the solution view.
From our solution view, expand Tables -> Manufacturer and click on Views to show the following:

We’re interested in the first view here Active Manufacturers. As with different types of forms, we’ll look at the different types of views another day. Let’s click on the Active Manufacturers view to see the following:
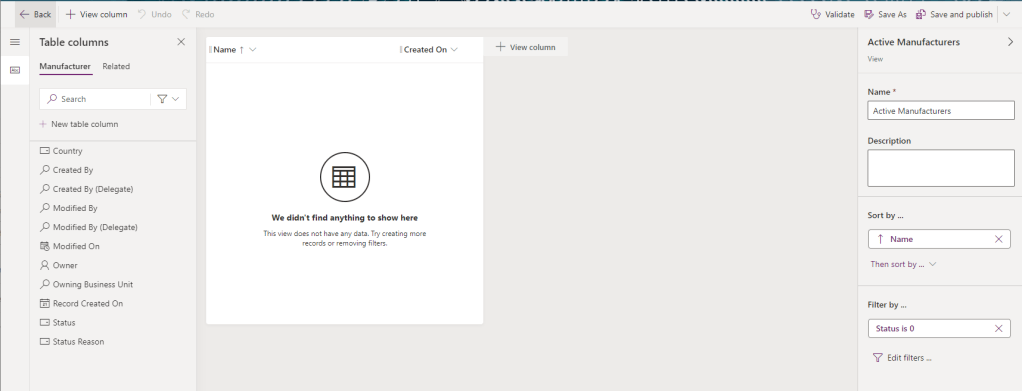
Views are the screens used to display a table of records. For any new view, the following fields are shown by default:
- Primary column – in this case, Name
- Created On – the date each record was created
Note the right hand side of the screen:
- Sort by is set to Name – records will be ordered in ascending name order.
- Filter by is set to Status is 0 – only Active records are shown.
From the left hand side of the screen, we can see the list of available fields that we can add to our view. Let’s click on Country and drag and drop it onto our form between the Name and Created On fields:
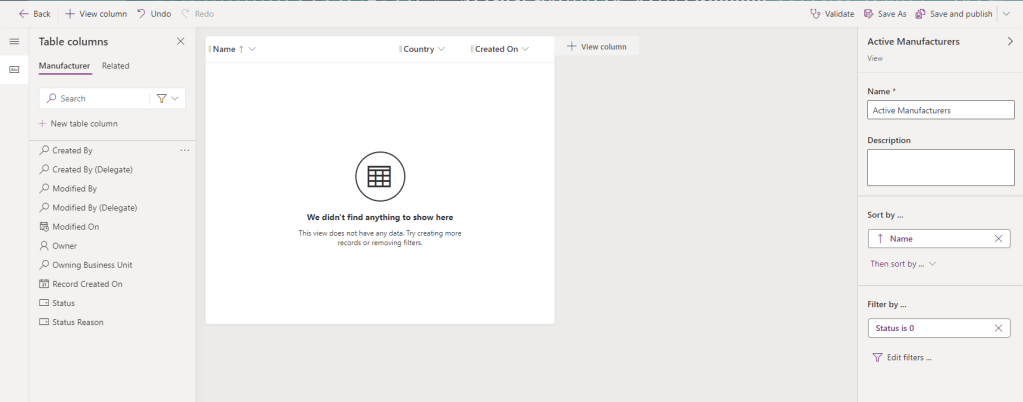
And that’s our first View! Click the Save and publish button in the header, then the Back button to return to the solution view.
Now let’s build the UI for our Model table.

Leave a reply to Power Automate, Power Apps and Microsoft Forms – Power Platform Pete Cancel reply