The Vehicle Table
From our solution view, expand Tables -> Vehicle and click on Forms. From our list of forms, we are again interested in the form where Form type is Main.
So far, all our forms have displayed our fields in a single column. We are gathering a lot of data for each Vehicle, so let’s split the form into two columns. Firstly, click on the border of the box that contains the existing fields to highlight it in purple; note the options that appear in the right hand side navigation:
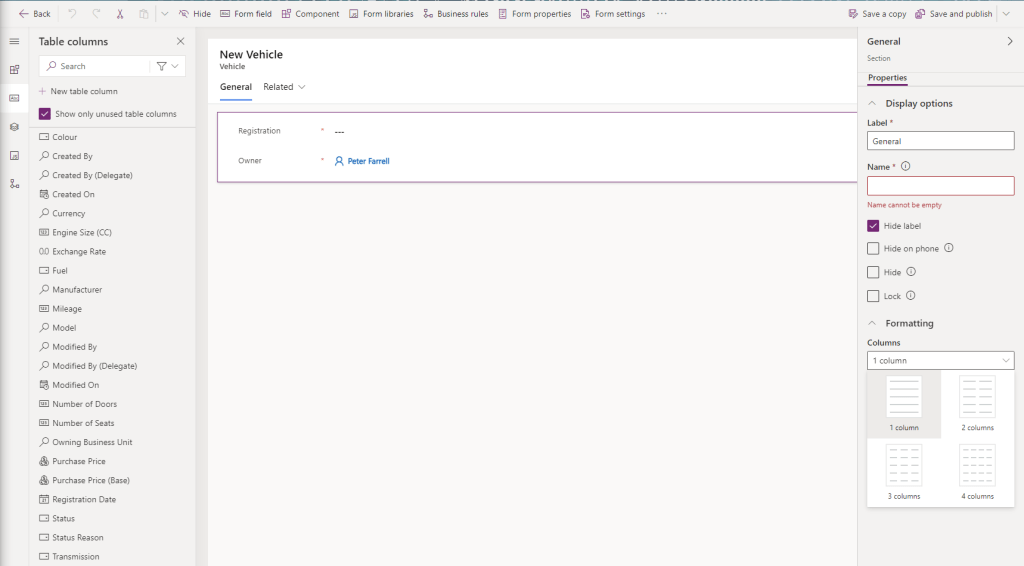
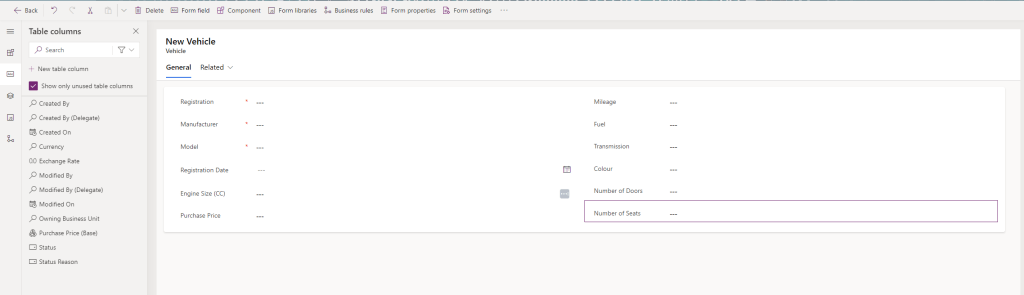
Under Formatting -> Columns, select 2 columns. Next, drag and drop the fields we need into the form. I have settled on the following arrangement
| Registration | Mileage |
| Manufacturer | Fuel |
| Model | Transmission |
| Registration Date | Colour |
| Engine Size (CC) | Number of Doors |
| Purchase Price | Number of Seats |
I’ll use the same steps as before to Hide the Owner field, and my form looks like this:
Note that my Manufacturer and Model fields are Lookup fields, so I want to select each of those and:
- Disable most recently used items – check this.
- Use Main Form Dialog for Create – and this.
- Use Main Form Dialog for Edit – and this as well.
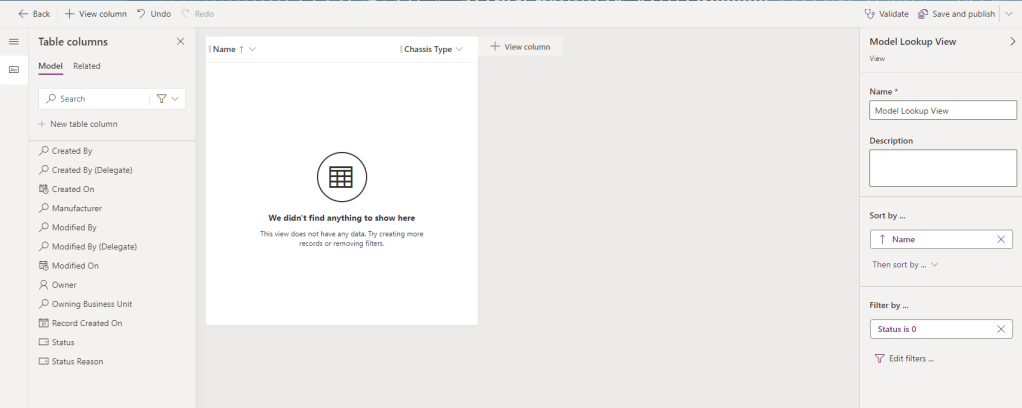
Also, for the Model field, I want to click the pencil icon beside Model Lookup View
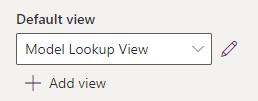
This launches the Model Lookup View in a new tab. Let’s make the following changes:
- Drag Chassis Type after Name.
- Right-click on the Created On header and select Remove.
- Right-click on the Name header and select Sort A to Z.
This will result in the following View:
As before, click Save and publish in the top right and close the tab on successful save.
Another tweak on our Model field – select the field and scroll all the way down to Filtering at the bottom of the right hand navigation. Complete as follows:

- Filter by related rows – check this to enable the fields below.
- Relationship to current table – select Manufacturer (Vehicles)
- Relationship to this lookup’s table – this will be set to Manufacturer (Models) when the previous field is set
- Allow users to turn off filter – leave this unchecked
What does this do? This filters the values available in the Model lookup based on what is selected in the Manufacturer lookup. This is, if we set the Manufacturer as Ford, then only Ford models appear in the Model lookup, set it as Honda, only Honda models are shown. Let’s click Save and publish and then Back to return to the solutions view.
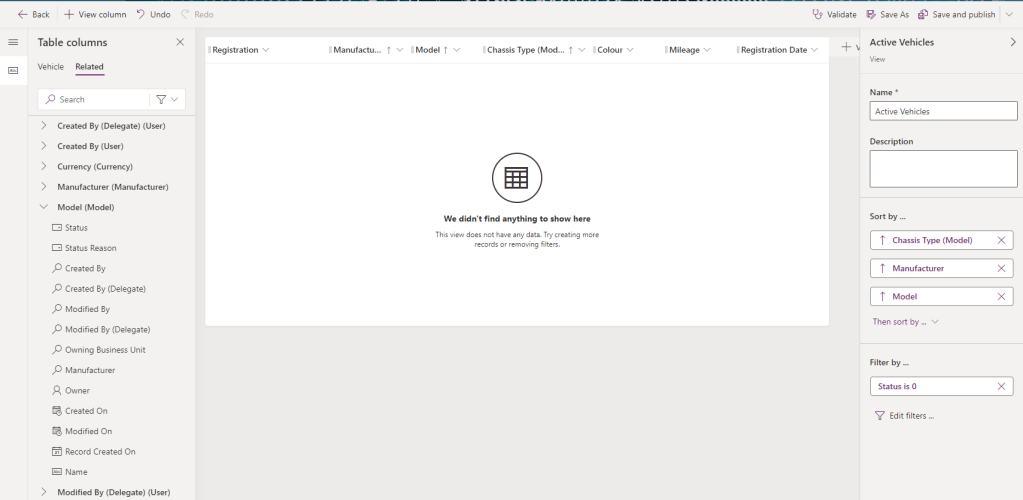
From our solution view, expand Tables -> Vehicle and click on Views. Select the Active Vehicles view and do the following:
- Drag the Manufacturer field after Registration
- Drag the Model field after Manufacturer
- Drag the Colour field after Model
- Drag the Mileage field after Colour
- Drag the Registration Date field after Mileage
- Right-click on the Created On header and select Remove
- Right click on Manufacturer and select Sort ascending
- Under Sort by… click Then sort by… and select Model
Next, click on Related under Table columns and expand Model (Model):

This tab has properties of all related entities. Let’s drag Chassis Type onto our view after the Model column. Under Sort by… click Then sort by… and select Chassis Type (Model). This will leave us with the following view:
As before, click Save and publish, and we’re done.
- Data model – check
- Forms and views – check
All prep work done. Next lesson we’ll build our app.

Leave a comment