
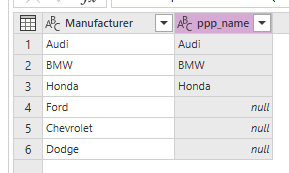
Observe the result below. Our Left outer join will join all records on our left dataset (the CSV data) to records on our right dataset where the Name on the left matches Name on the right. Where no match is found, the right value is set to null.
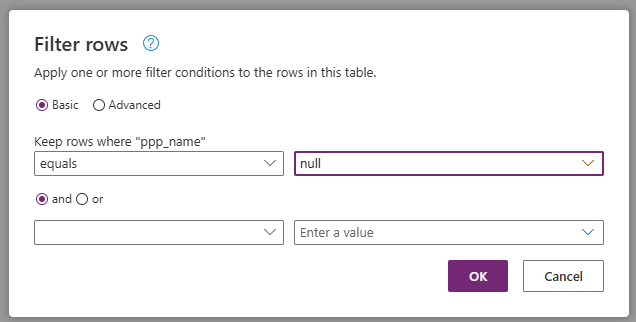
What does this mean? Put simply, those records where a match is found are those Manufacturers already in our Dataverse table. Those where no match is found are the ones we should add into Dataverse. Click on the Filter rows button in the top ribbon and select Keep rows where “ppp_name” equals null before clicking OK.
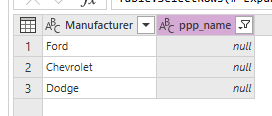
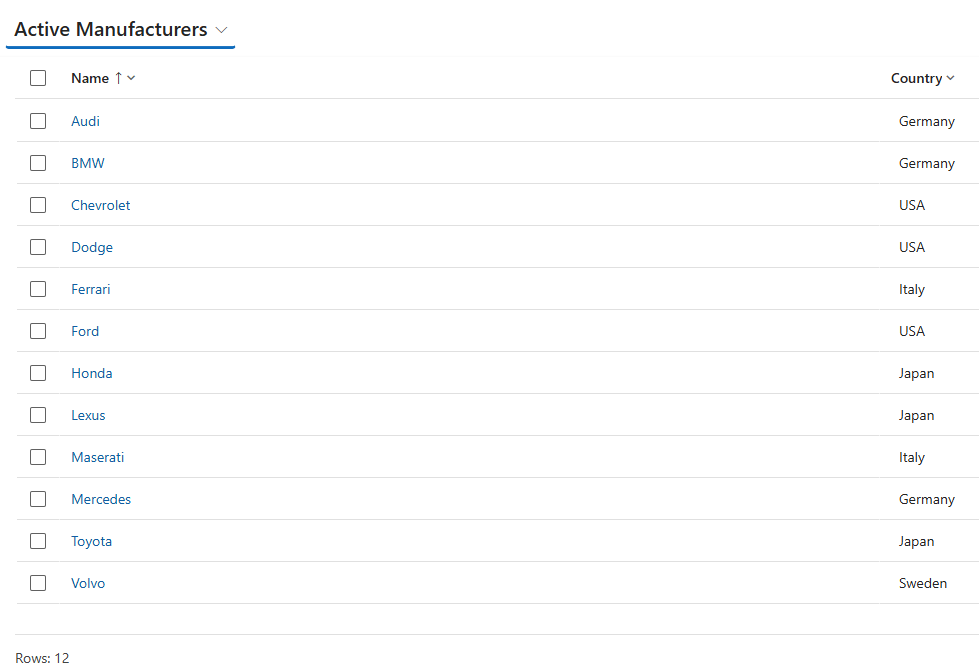
The result is the new Manufacturers we want to add to Dataverse.
We’re not done yet! There’s two pieces of information we want to add to our records.
- Manufacturer Country
- Manufacturer Code (alternate key value from our previous post)
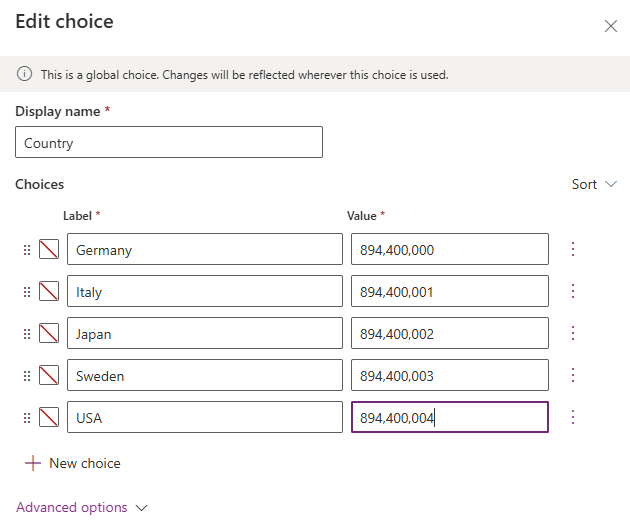
To recap, here are the list of choices we have set for Country:
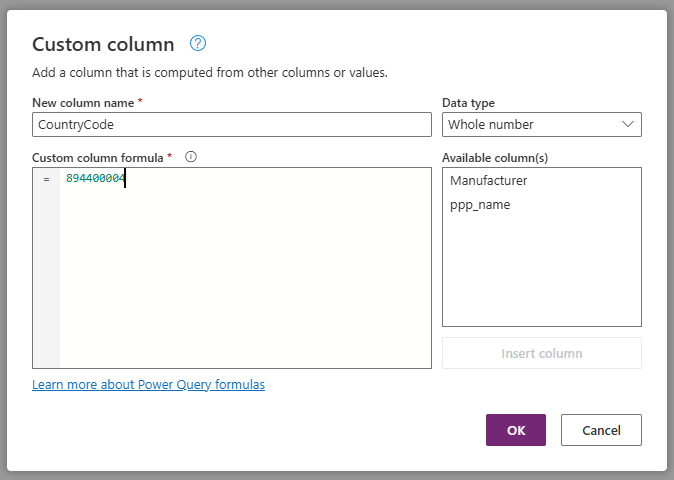
Select Add column > Custom column from the top ribbon.

From the popup that appears, I enter the following values before clicking OK.
- New column name – CountryCode
- Data type – Whole number
- Custom column formula – 894400004
I’m cheating a bit here. All the new Manufacturers are from the USA, which has a choice value of 894400004 as per the screenshot above, so I’ve hardcoded it to match. In fact, I could have also set this as a Text column and hardcoded the value to USA and the Dataflow would do the necessary mapping as long as the entered value matches one of our Choice labels. (We’ll look at conditional columns in our next post!)
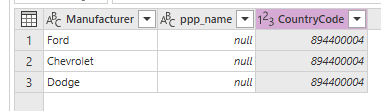
And we have the result shown.
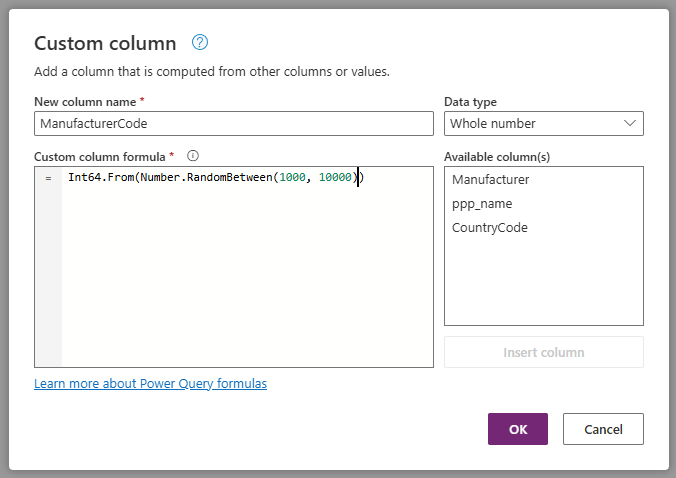
Now we want to add a Manufacturer Code value. This is an alternate key, as discussed in our previous post. The value itself doesn’t necessarily have to be the next value in our integer sequence, it just needs to be an integer not in use already. Again, we click on Add column > Custom column from the top ribbon and enter the following values.
- New column name – ManufacturerCode
- Data type – Whole number
- Custom column formula – Int64.From(Number.RandomBetween(1000,10000))
The custom Power FX formula value assigns each record a random value between 1000 and 10000. Such a wide range would reduce the possibility of duplicate values. Click OK.
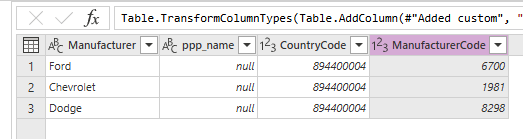
And we have the following result:
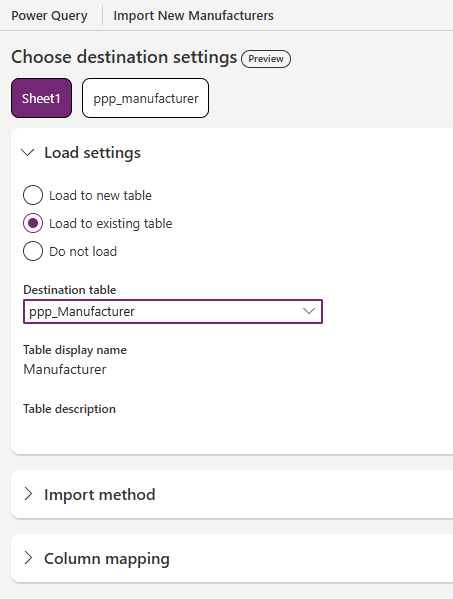
At the bottom of our Power Query dialog, click Next to show the Choose destination settings screen. Select our dataset (Sheet1 in my example), and select the following under Load settings
- Load to existing table
- Destination table – Manufacturer table (ppp_Manufacturer for me)
Click on Import method and stick with the default value of Append

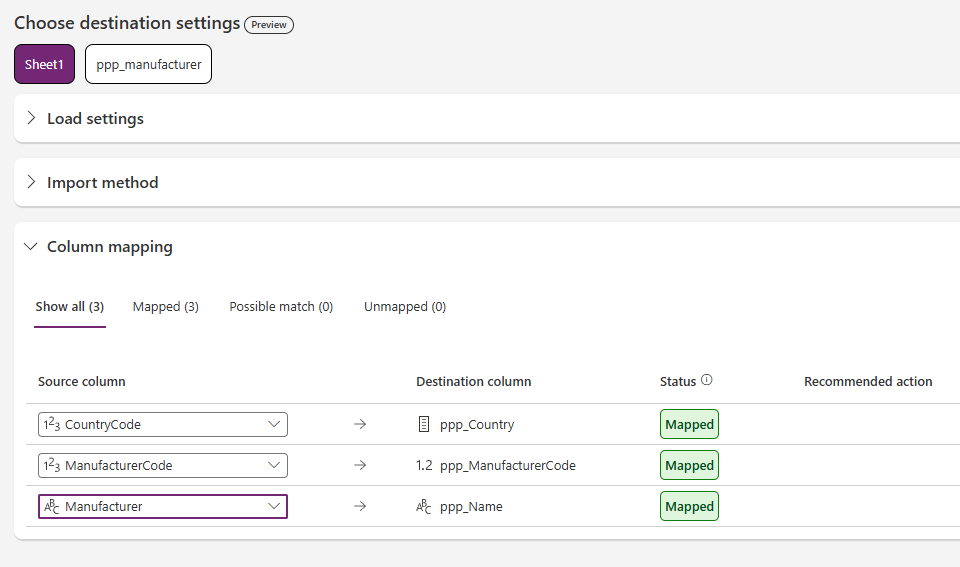
Click on Column mapping and map values as follows
- CountryCode -> ppp_Country
- ManufacturerCode -> ppp_ManufacturerCode
- Manufacturer -> ppp_Name
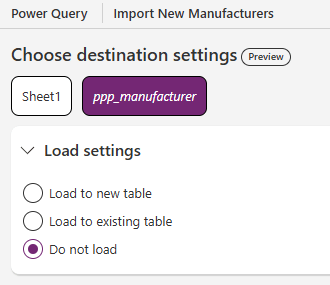
Having completed the mapping section, select the section dataset (ppp_manufacturer) from the top. Under Load settings, select Do not load.
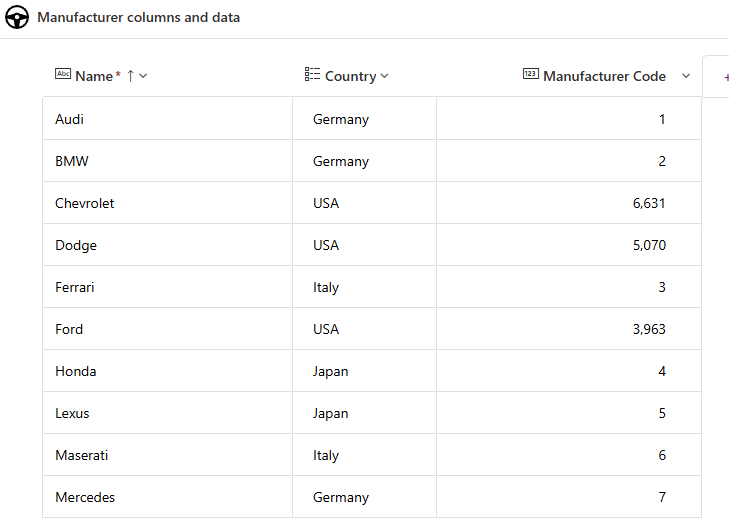
After click Next, proceed to Publish our Dataflow and let it refresh as per our previous post. On completion, we can see our new Manufacturers have been added along with their Country and Manufacturer Code in our table.
Furthermore, we can see they have been added to our LaRausso Autos app:
So that’s our reference tables successfully added! We have covered Dataflows loading into a single table before, but in this post we’ve built on our Power Query skills, introducing:
- Selecting only the required columns
- Removing duplicate records from our dataset
- Working with multiple data sources
- Working with table joins
- Filtering records by column value
- Creating custom columns
- Power FX formulae
In our next post we’ll add rows to our Model table. This table has a foreign key back to our Manufacturer table, so the challenge is to correctly map Model to Manufacturer in Dataverse. Of course, we don’t want to add any Models we already have, so there’s that to consider as well!
Stay tuned!

Leave a comment