
All of the tables in our LaRusso Autos app have relationships with other tables, for example:
- One Manufacturer makes Many Models
- Many Vehicles are of the same (One) Model
- One Customer has Many Services
Relationships like these are modeled as Lookup columns on our Dataverse tables, and when added to a Form, they look something like this:

You can see here that the Manufacturer is a lookup, and the name of the Manufacturer is shown. Model is another lookup, and we can see the Model name and chassis type in our search box (although only the name will be displayed when selected).
Both the Manufacturer and Model tables have a relatively small number of columns, so in this instance, merely showing the respective name field is sufficient. But what if we wish to show more information about the linked entity?
Let’s consider our last post where we added link tables to our LaRusso Autos app to enable Vehicle Servicing. When we create a new Service, both the Customer and the Vehicle values are lookup tables, and the form renders as follows:
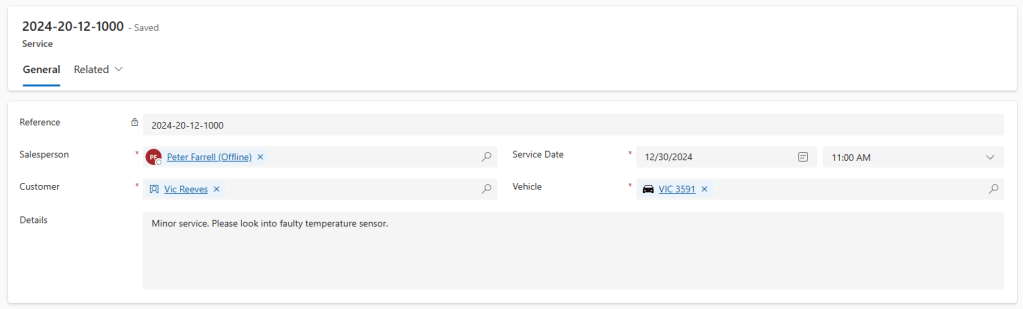
If we want the full details of the Customer or the Vehicle, we would have to go to their relevant pages. It would be beneficial if we had this information at a glance on the same page. This is where Quick View Forms come in!
Despite being forms, Quick View Forms are read only, and are limited to single column displays. They are used to present a short summary of a selected record – in our case, we would like to add a short summary of our Customer and Vehicle entities.
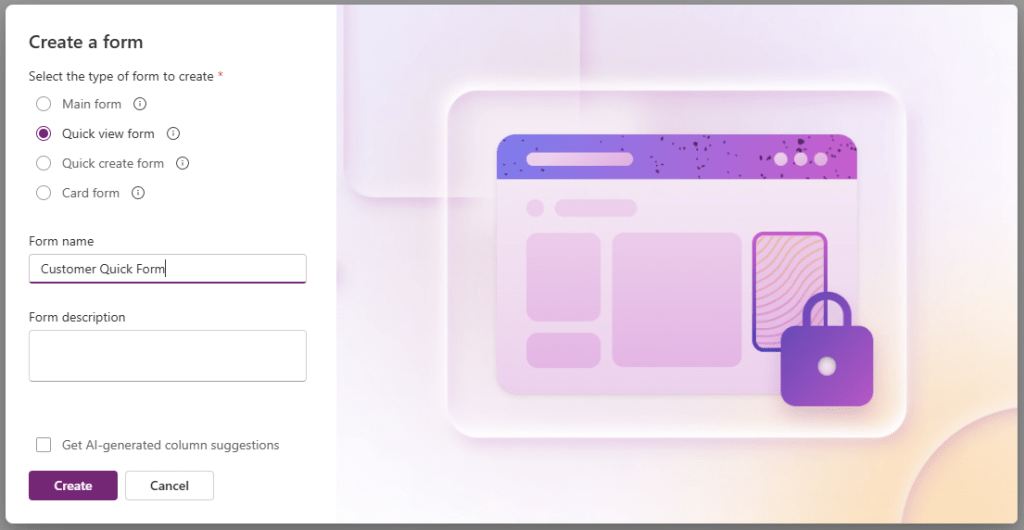
Lets begin with the Contact table. From our solution view, select Tables -> Contact -> Forms from the side navigation. From the top ribbon, click the + New Form button and fill in the dialog shown below, being sure to select the Quick view form radio button.
From the Form create screen, drag and drop the fields we wish to display on our form. I’ve chosen:
- First Name
- Last Name
- Mobile Phone
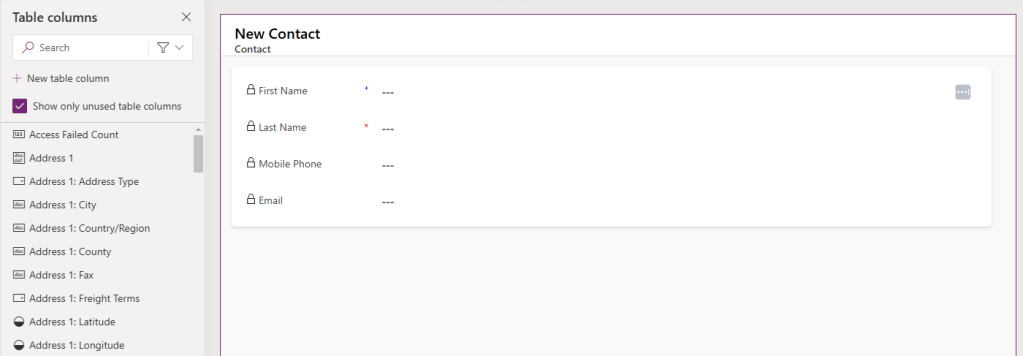
Note that all selected fields are Read Only by default (this cannot be altered). When you are happy with your result, click the Save and publish button before clicking the Back button to return to the solution view.
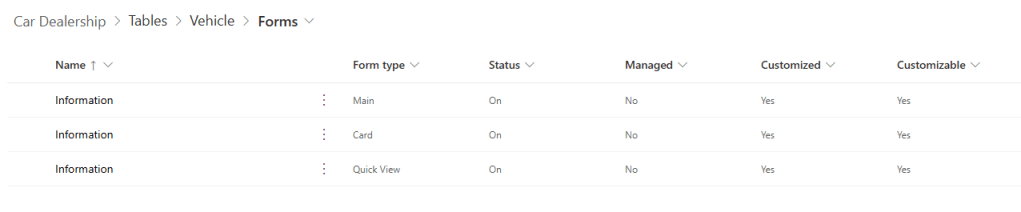
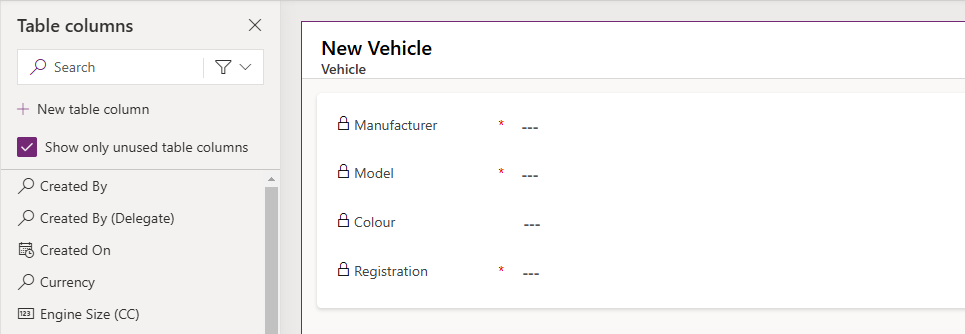
If we navigate to Tables -> Vehicle -> Forms from the side navigation, we can see that we already have a Quick View form named Information – this is because all custom tables will have these forms by default.
Select the Quick View form to edit as desired. I’ve chosen
- Manufacturer
- Model
- Colour
- Registration
Again, click the Save and publish button before clicking the Back button to return to the solution view. Now we need to add our Quick View Forms to our Service form.
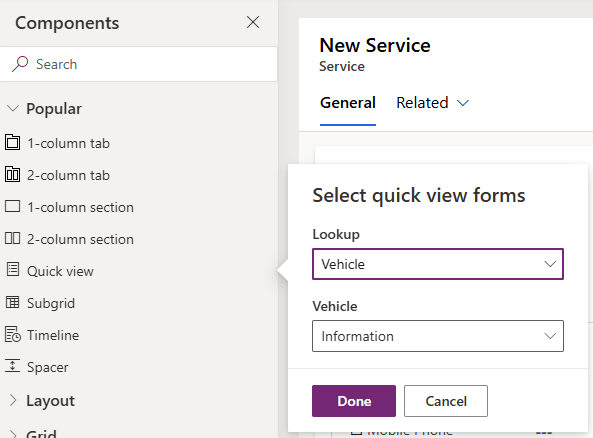
Navigate to Tables -> Service -> Forms from the side navigation and select the Main form from those listed to edit this form.
From the Components view on the left, select Quick View and complete the dialog shown
- Lookup – Customer
- Contact – Customer Quick Form

Drag and drop the control onto the form before adding another Quick View component for the Vehicle
- Lookup – Vehicle
- Vehicle – Information
Drag and drop the control onto the form, and it should now look like this:
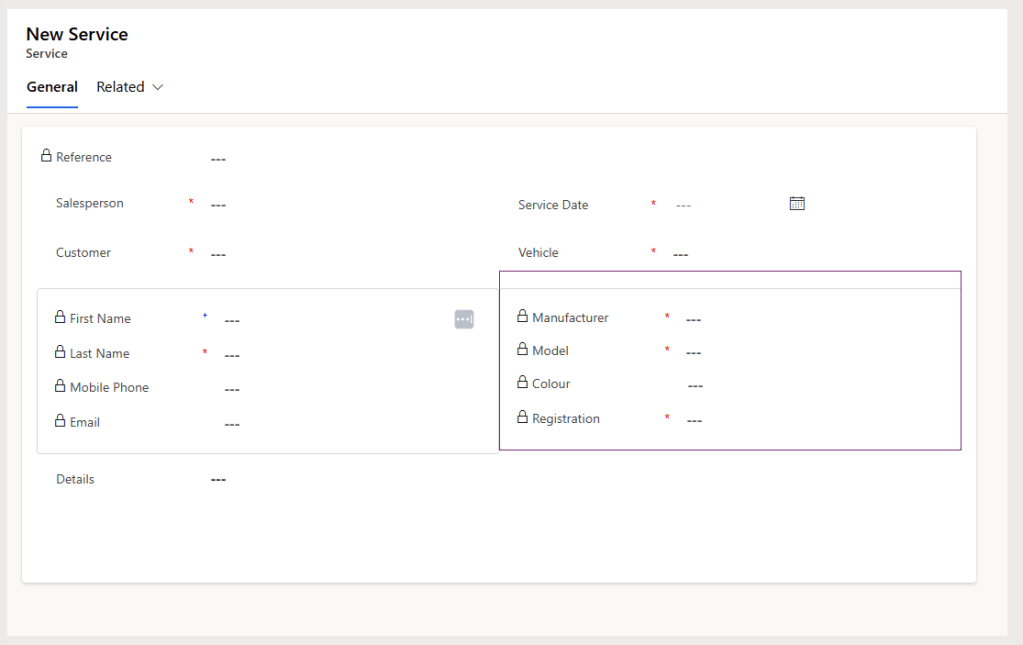
Click Save and publish. Now when we view the Service record from above, it renders as follows:
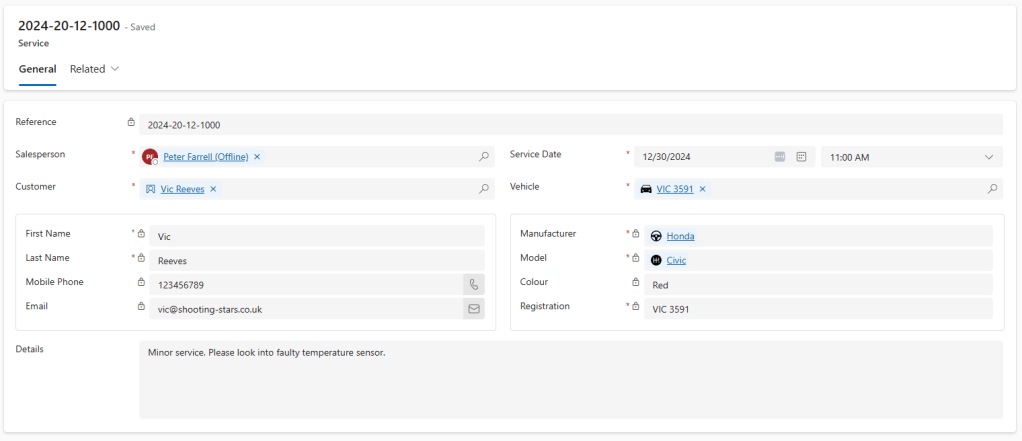
All the information we need without having to navigate away from the screen!

Leave a comment